How to Simply Deploy a Smart Contract on Ethereum

In this tutorial Pascal shows you how to set up self-executing contracts - so-called Smart Contracts.
Pascal Marco Caversaccio
June 19th, 2020

Smart Contracts and Ethereum

At the core of the Ethereum blockchain lies the concept of smart contracts. The original motivation for Ethereum actually stems from Bitcoin’s scripting limitations, which provide limited support for smart contracts.

Okay, understood, but what does that mean exactly?

Well, Bitcoin has limited support for smart contracts since its scripting language is non-Turing-complete, in part due to its lack of loops. This means that there are many applications that can be programmed on Ethereum by developers, but not on Bitcoin. Technically speaking, Ethereum has been designed from the beginning as “a platform for the deployment and execution of smart contracts”.

What does Turing-complete mean?

Ethereum’s Turing-complete language is originally based on Alan Turing’s concept of an Universal Turing machine (UTM). Simply put, a Turing machine is a hypothetical machine invented by the mathematician Alan Turing in 1936. Despite its simplicity, the machine can simulate any computer algorithm, no matter how complicated it is. And the UTM is nothing more than a Turing machine that simulates an arbitrary Turing machine on arbitrary input. However, since Ethereum implements the concept of a gas limit, developers cannot run programs that require more gas than the gas limit. Thus, the Ethereum yellow paper calls the Ethereum Virtual Machine, the EVM, a “quasi-Turing-complete machine”. In spite of many similarities, Ethereum is not really Turing-complete, since developers cannot program anything they want without gas.

What is a Smart Contract?

Let us therefore quickly take a look at the definition of a smart contract:

  • A smart contract is a self-executing contract with the terms of the agreement between a buyer and a seller being directly written into lines of code.

  • The code and the agreements contained therein exist across a distributed, decentralised blockchain network.

  • The code controls the execution, and transactions are trackable and irreversible.

Everything grasped from a theoretical perspective? Great, let us get hands-on. For those who want to delve even deeper into the history of Ethereum and smart contracts I recommend this blog post.

A Smart Contract Tutorial

The purpose of this tutorial is to show you one of the easiest ways to deploy a smart contract on Ethereum. And in doing so, I will follow a certain structure that is common in the realm of smart contract development. First, we deploy the smart contract locally on a personal blockchain (I will use Ganache). Second, we deploy the smart contract on one of the designated test networks (I will use the Rinkeby test network). Third, we deploy the smart contract on the main network.

As the development framework I am using Truffle. Truffle is a development environment, testing framework, and asset pipeline for Ethereum, aiming to make life as an Ethereum developer easier.

1)  Preparation: Install the Necessary Tools

We need some basic tools to get started properly. First of all we download Node.js. It must be at least version 8.9.4. I also assume that we use Windows, Linux, or Mac OS X. Once we are ready, we open our shell and run the following command:

npm install -g truffle

Truffle also requires that we have a running Ethereum client which supports the standard JSON RPC API (which is nearly all of them). We use Ganache – part of the Truffle suite – a personal blockchain for Ethereum development that runs on our desktop. We can download it here

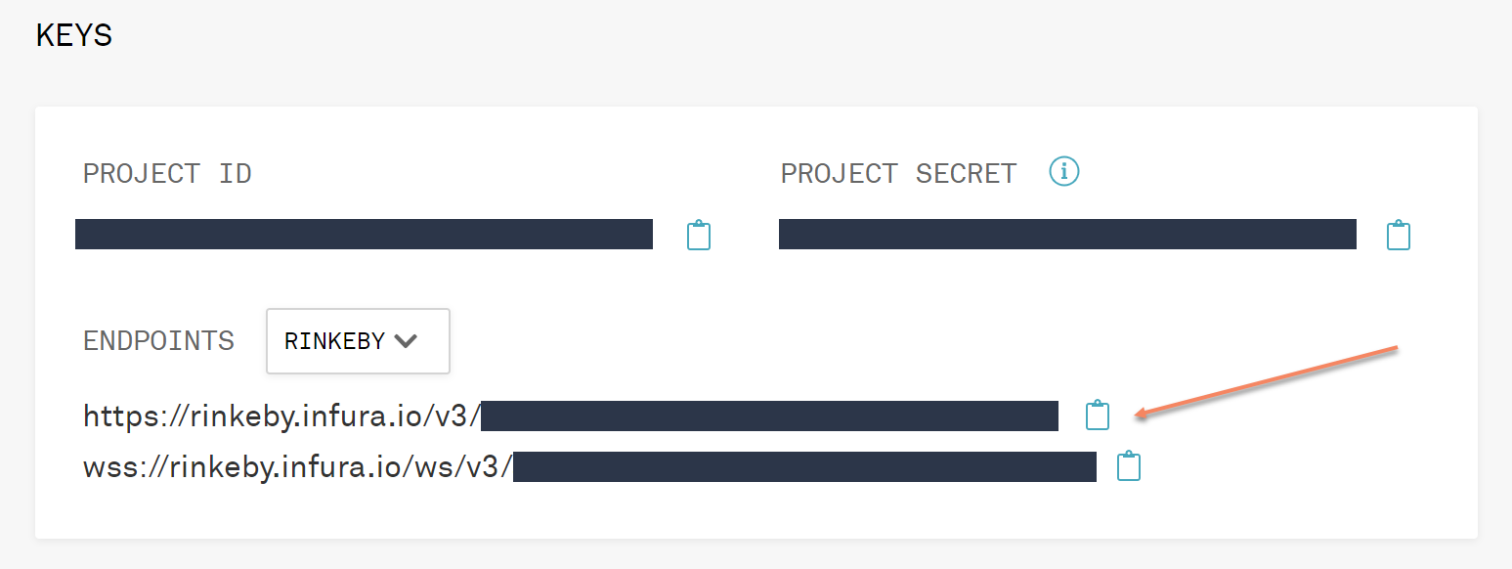
Eventually, since we do not want to install a full node, we use Infura as a hosted Ethereum node cluster that allows users to run and deploy their application without having to set up their own Ethereum node. We create a simple free account on Infura and create a new project. We change the endpoint in the settings of the project to Rinkeby and copy and save the URL of the endpoint for Rinkeby to a location of our choice.

/assets/1-img/content/infura_keys.png

Now we are ready to deploy a smart contract. But, of course, we have to write one first.


2)  Craft a Smart Contract Leveraging the OpenZeppelin Library

We create a new directory for our Truffle project:

mkdir TestERC20Contract
cd TestERC20Contract 
truffle init

For the sake of this tutorial we will simply leverage the OpenZeppelin library for smart contract development. We can install OpenZeppelin by running the following commands:

npm init -y
npm i openzeppelin-solidity@2.5

Remark: We use a specific OpenZeppelin version due to truffle compatibility issues.

In the contracts/ directory of our Truffle project, we create the file TestERC20Contract.sol and add the following content:

pragma solidity ^0.5.0;  
    
import "../node_modules/openzeppelin-solidity/contracts/token/ERC20/ERC20.sol";  
    
contract TestERC20Contract is ERC20 {  
    
uint256 public initialSupply = 1000;  

constructor() public {  
_mint(msg.sender, initialSupply);  
}  
   
}

3)  Deploy the Smart Contract on Ganache (Your Personal Blockchain)

Let us now deploy the above designed smart contract to the locally running blockchain Ganache. Open Ganache and select an Ethereum quick-start project. In the header of the project we get the RPC server parameters and the network ID.

/assets/1-img/content/ganache_header.png

In the file truffle-config.js we adjust these parameters. We also configure the compiler version to use version 0.5.0, because our contract is written in this particular Solidity version. 

host: "127.0.0.1",     // Localhost (default: none)  
port: 7545,            // Standard Ethereum port (default: none)  
network_id: "5777",       // Any network (default: none)
compilers: {  
 solc: {  
   version: "0.5.0",    // Fetch exact version from solc-bin (default: truffle's version)  
 }  
}

In the migrations/ directory we create the file 2deploycontracts.js and add the following content:

var TestERC20Contract = artifacts.require("../contracts/TestERC20Contract.sol");  
    
module.exports = function(deployer) {  
 deployer.deploy(TestERC20Contract);  
};

Now we are ready to compile and deploy our contract to the blockchain. Inside our project we first run the following command to compile the contract:

truffle compile

Once the compilation is complete, we submit the contract to the blockchain:

truffle migrate

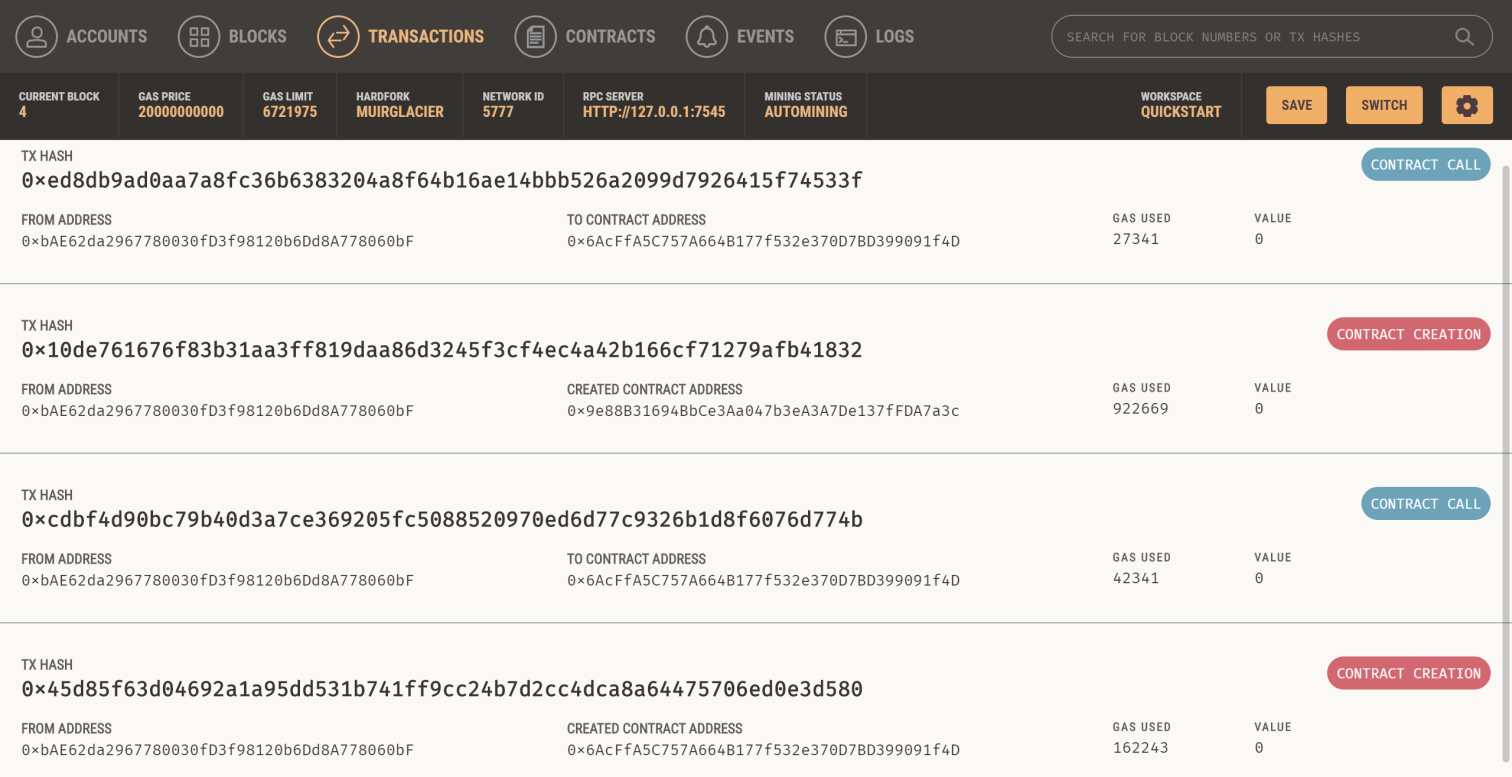
We now head back to the Ganache blockchain and click on “Transactions”. Congratulations, we have locally deployed our first smart contract.

/assets/1-img/content/ganache_contract_deployment.png

But this is by no means the end of the story. Our next goal is the deployment on the public test network Rinkeby.


4) Deployment of the Smart Contracts

To start with, we need to install the package “@truffle/hdwallet-provider”:

npm i @truffle/hdwallet-provider

Now we edit the truffle-config.js file to set up the “hdwallet-provider” and the connection to the Rinkeby network. 

We provide a reference to our mnemonic that generates our account on MetaMask and include the URL of the Infura endpoint for Rinkeby (see above). Eventually, we ensure that our account holds enough Rinkeby Ether to conduct the deployment. For that we can use an Ether faucet.

var HDWalletProvider = require("@truffle/hdwallet-provider");  
var mnemonic = "orange apple banana ... ";  
module.exports = {  
 networks: {  
 development: {  
  host: "127.0.0.1",  
  port: 8545,  
  network_id: "*"  
  },  
   rinkeby: {  
     provider: function() {   
     return new HDWalletProvider(mnemonic, "https://rinkeby.infura.io/v3/<INFURA_Access_Token>");  
     },  
     network_id: 4,  
     gas: 4500000,  
     gasPrice: 10000000000,  
  }  
 }  
};

We also change the 2deploycontracts.js file in the following way:

var TestERC20Contract = artifacts.require("../contracts/TestERC20Contract.sol");  
    
module.exports = function(deployer, network, accounts) {  
 deployer.deploy(TestERC20Contract, {from: accounts[0]});  
};

If not already compiled, we can compile it by running truffle compile. Finally, we deploy it to the Rinkeby test network:

truffle migrate --network rinkeby
/assets/1-img/content/deployment_shell.png

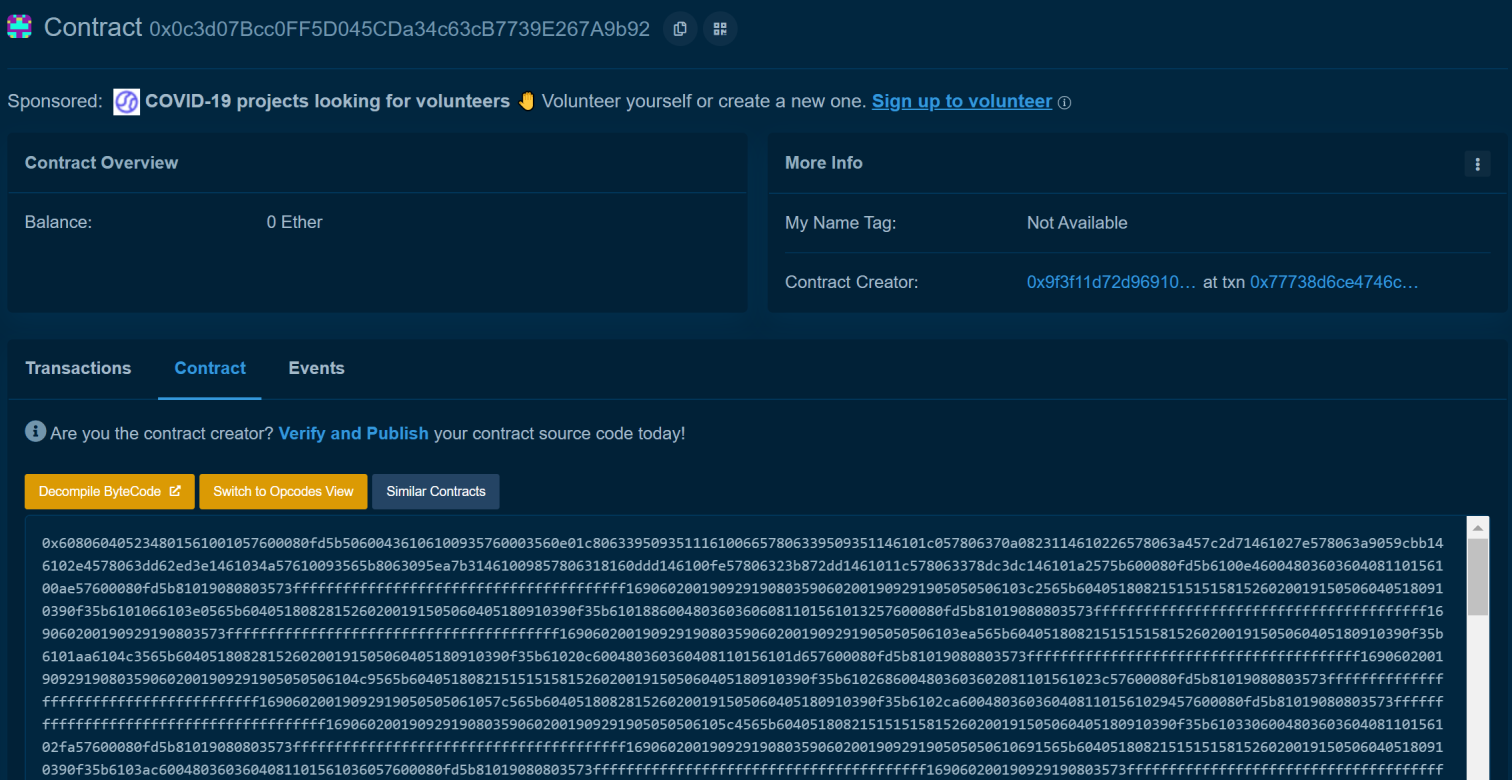
We can now check out our smart contract on Etherscan using the contract address. But wait, when we click on the “Contract” tab all we see is a huge pile of letters and numbers.

/assets/1-img/content/etherscan_rinkeby_contract.png

To be able to perform smart contract interactions, we need to make sure that we really are the contract creator. If we are successful, the huge pile of letters and numbers will disappear and we can call the smart contract functions.


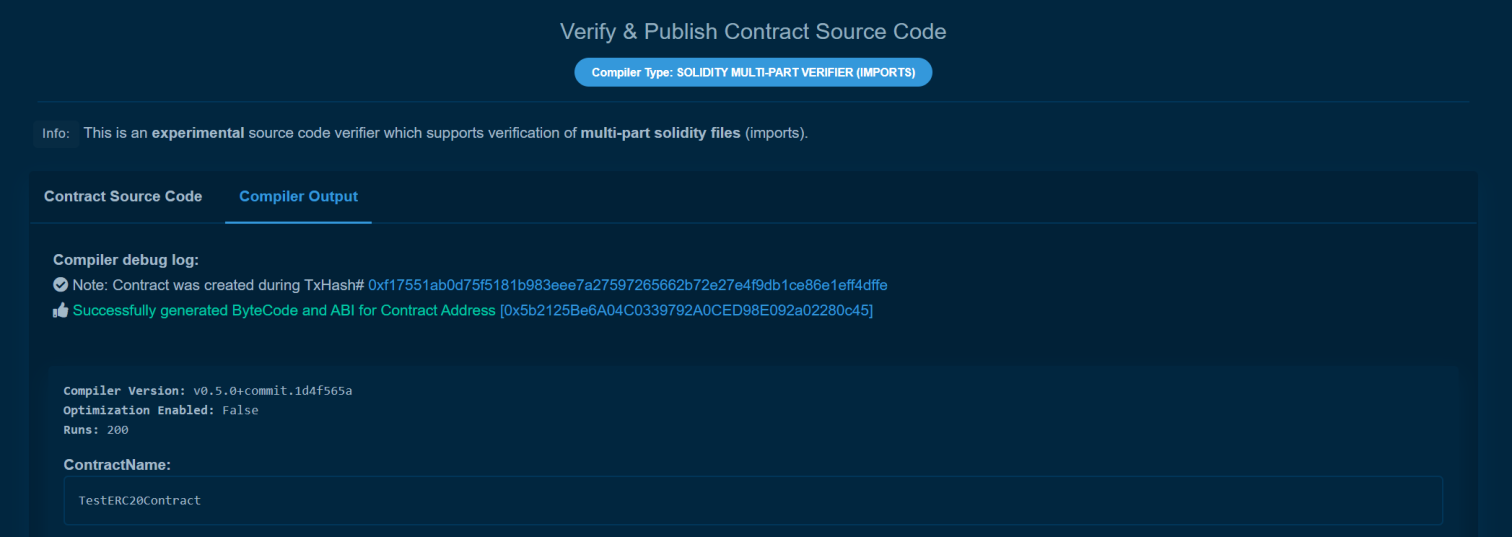
5)  Verify the Smart Contract Code

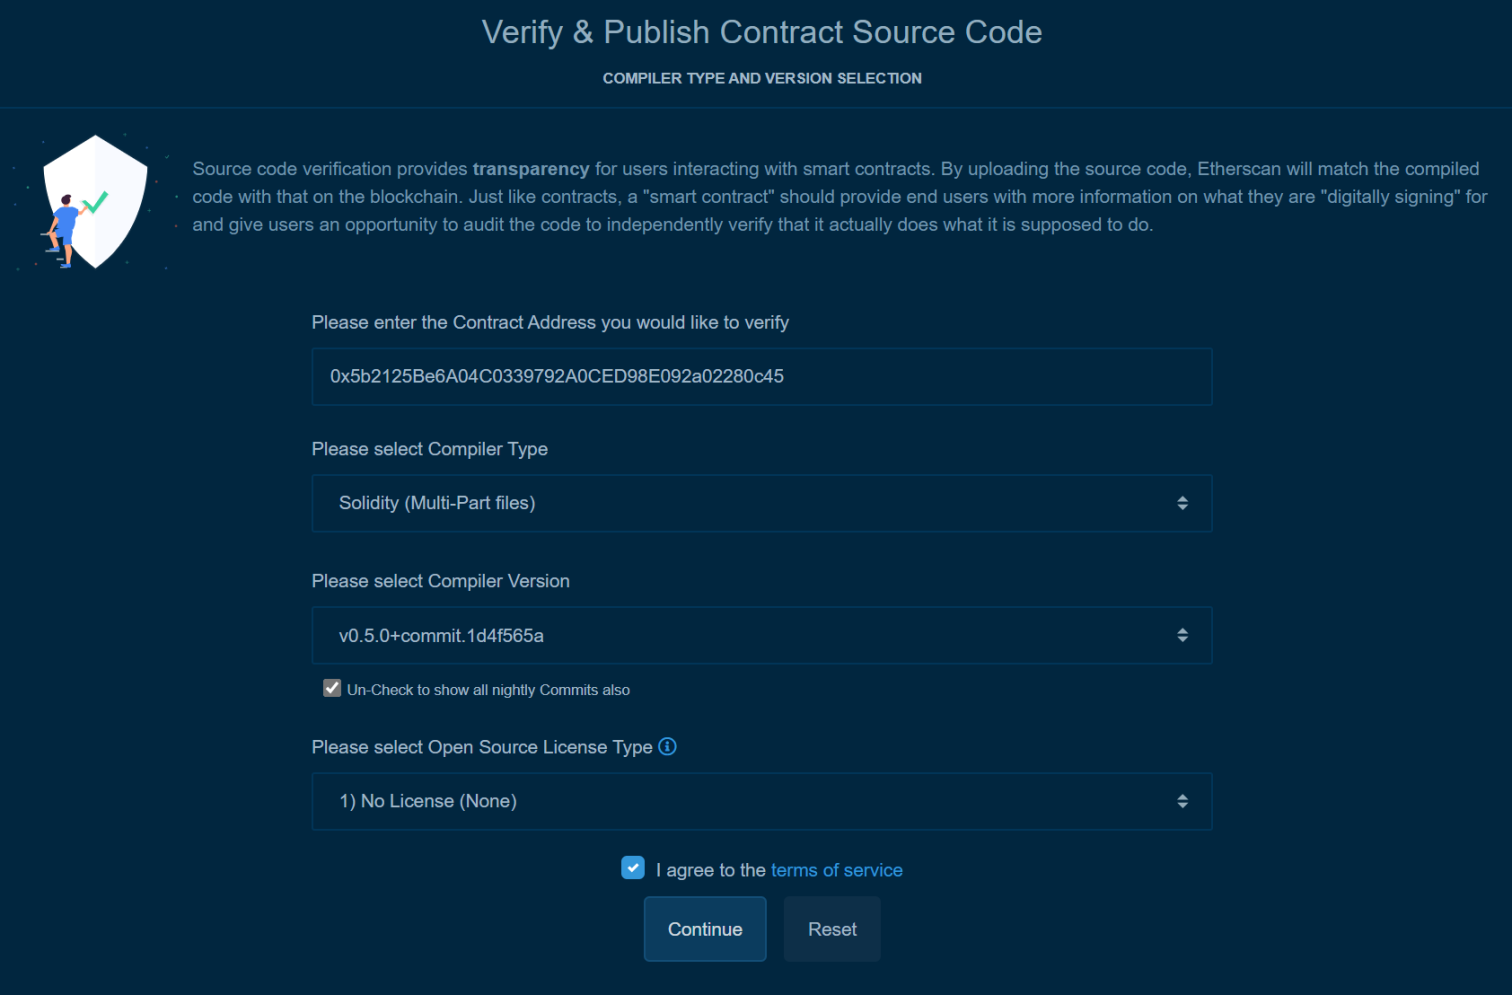
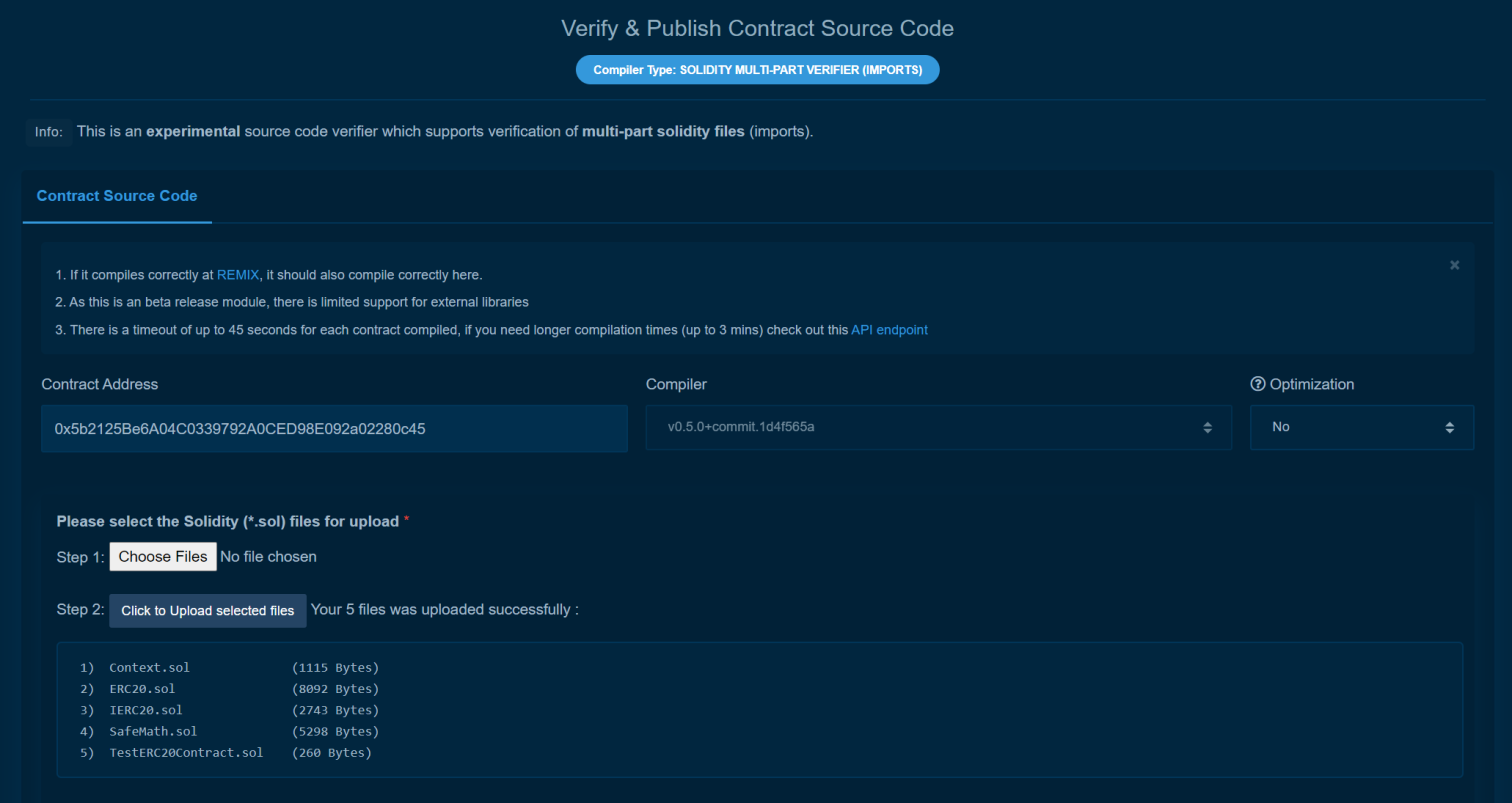
Let us do that. We click on “Verify and Publish” and just simply follow the instructions:

/assets/1-img/content/verify_publish_1.png
/assets/1-img/content/verify_publish_2.png
/assets/1-img/content/verify_publish_3.png

Congratulations again, we have verified our first smart contract.


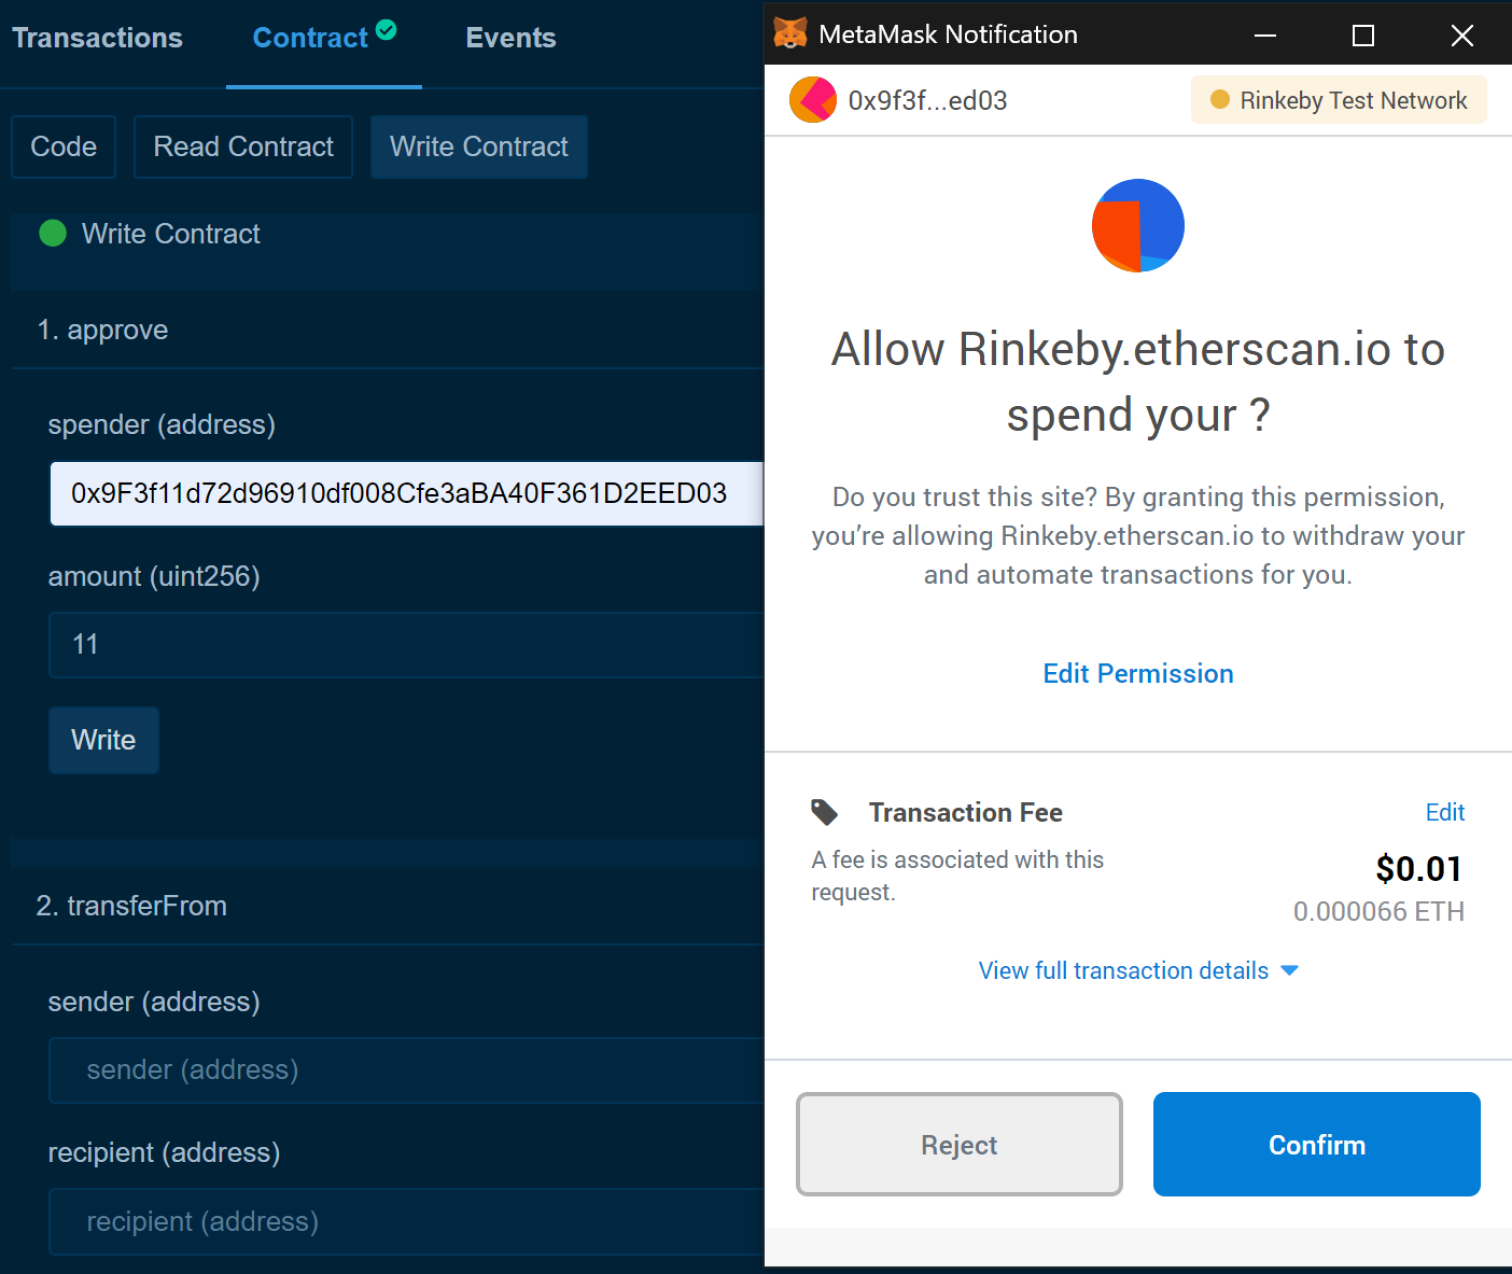
6)  Interact With the Smart Contract via the Simple User Interface of Etherscan

If we click now again on the “Contract” tab and switch to “Write Contract”, we can observe that it now becomes easy to interact with the deployed smart contract. We only need to connect to our MetaMask account and we can start to e.g. approve or transfer tokens. Oh boy, we have come a long way. The final remaining step is the deployment of exactly the same smart contract on the Ethereum main network.

/assets/1-img/content/smart_contract_interaction.png

7)  Deploy the Smart Contract on the Ethereum Main Network

For the final deployment we need to get real Ether on our MetaMask account. Also, we simply change the network_id in the truffle-config.js file to 1 and adjust the Infura URL with the reference to the main network. And that is it! We are ready to deploy again. We are now smart contract professionals! 


Warning: If you send Ether to any account generated from Ganache's default mnemonic, you will lose it all! 

It is obvious that I did not delve into many specifications that are very crucial and pivotal in practice (e.g. unit tests). Nevertheless, I hope that I could trigger your curiosity and motivate you to learn more about smart contracts and their applications. See you soon.